
 Marcio Vasconcelos
If the paint on your kitchen’s cabinets are showing signs of use, if it has some sort of damage exposed or not, or the color is simply fading away, it might be a great idea to paint it. Nowadays we are getting more conscious about our level of consumerism. We are looking to fix our furniture, giving it a new face, instead of throwing it away at the first sight. This option is good for the environment and for our pockets.
DIY painting kitchen cabinets is an excellent way to refresh your kitchen's look without the hefty cost of a full remodel. If you are going to start your own project and are in need of some guidance, keep reading!! We’ve prepared useful content for you.
What Kind of Paint Do You Use on Kitchen Cabinets?
Choosing the right paint is crucial. Look for paints formulated for woodwork and cabinets.
Latex paints have been continuously improving, leading to a shift among some professionals towards these water-based options. The appeal of latex paints lies in their quick drying time and ease of clean-up, as they can be washed off with water.
However, despite these advantages, some professionals prefer oil-based paints for topcoat applications. They argue that oil-based paints offer a harder, more resilient film and smoother finish upon leveling out. One drawback of latex paints is their longer curing time, which can be up to three weeks, during which they remain more vulnerable to damage.
In conclusion, both oil and latex paints can yield satisfactory results. When opting for latex paint, it's advisable to choose a 100 percent acrylic formula, which provides better durability and adhesion compared to vinyl acrylic options.
Remember, glossier surfaces highlight imperfections, so if you're not an experienced painter, opt for an eggshell or satin sheen. Alkyd-based enamel paints are recommended for their smooth finish and durability.
Do I Need Primer to Paint Kitchen Cabinets?
Yes, using a primer is essential, especially if your cabinets are stained. Primer serves as an effective base layer for paint, enhancing its durability and appearance. It ensures better adhesion of the paint to the surface, thereby extending its lifespan and improving its overall look. Shellac-based pigmented primers are known for drying fast and flat, offering an excellent base for your topcoat.
Can I Just Paint Over My Kitchen Cabinets?
Technically, you can paint over your kitchen cabinets, but for the best results, a thorough cleaning and sanding are necessary. Repainting cabinets made of wood, wood-laminate, or metal is generally straightforward.
However, when it comes to plastic laminate cabinets, the process might be more complex. These types of cabinets may not always accept a new layer of paint effectively. For those that can be repainted, specific paints and methods are often required, and the quality of the final result can vary.
Step by Step to Paint Kitchen Cabinets
Now that we’ve summarized a few questions, let’s get to work. To learn an effective method for painting your kitchen cabinets, simply follow the step-by-step process we've detailed for you:
Evaluate your cabinets to determine if they are suitable for painting:
Consider the overall conditions of the cabinets, and if it’s suitable to paint. Ideal candidates for painting are typically wood cabinets with plain designs, such as the Shaker style. As mentioned earlier, it's generally not advisable to repaint cabinets that have plastic laminate or rigid thermofoil surfaces, due to poor paint adhesion on these glossy materials.
For uncertain cases, conduct a test on a less visible part of the cabinet, like the inside of a base corner cabinet. Apply a small section of primer, let it dry overnight, and then check its adhesion the next day by trying to scratch it off. If the primer doesn’t scratch off easily, it suggests good adhesion for painting.
Gather the necessary materials
Make sure you have all the necessary tools and materials before starting your painting project to avoid interruptions. Here's a condensed list of essential items you'll need:
- Protective drop cloths
- Painter's tape for edges and trims
- A ladder for reaching higher places
- A drill or screwdriver for hardware removal
- A degreasing agent for cleaning surfaces
- Sponges for application of cleaners
- Wood filler for patching imperfections
- A putty knife for applying the filler
- Various grits of sandpaper for surface preparation
- A shop vacuum for cleanup
- Primer to prepare the surface for painting
- Paint in your chosen color
- Paint trays and liners for holding and mixing paint
- Applicators, which could include a sprayer, brush, or roller, depending on your preference
Prepare the cabinets
Begin the process by taking out everything from the cabinets, clearing the countertops, and moving any appliances that are not built-in away from the work area. Next, protect the backsplash, countertops, and flooring by covering them with protective materials such as drop cloths, builder's paper, or plastic sheeting.
Use a drill or screwdriver to take off all the doors, drawers, and their hardware. To ensure they are returned to their correct places, label each part with numbers. Simply apply masking tape to the back of each piece and note its precise location (for example, "Above the microwave"). Keep all screws and hinges in a container to ensure they are not misplaced.
Sand the surfaces lightly, especially if they're glossy or have a previous layer of paint
Despite how clean your kitchen might appear, it's essential to thoroughly clean all surfaces with a grease remover. This step is crucial because water-based paint will not adhere properly to surfaces covered in oil. Utilize a paint-prep degreaser and a nonabrasive scrub sponge for any stubborn spots.
After cleaning and drying the doors and drawers, use wood filler to mend any cracks or chips. Then, sand every surface to remove the glossiness. This creates a rougher surface that allows new paint or primer to adhere more effectively.
Prime after sanding. This step is crucial for stained cabinets
Apply the primer coat in an open space outdoors or a well-ventilated area inside your home. The primer is essential for covering any stains or wood grain and ensuring that the finish coat adheres properly.
Before you begin painting with a sprayer or brush, it's important to sand the surface once more, this time using ultrafine sandpaper. While these additional steps may extend the duration of your project, they are critical for achieving strong adhesion and a high-quality finish.
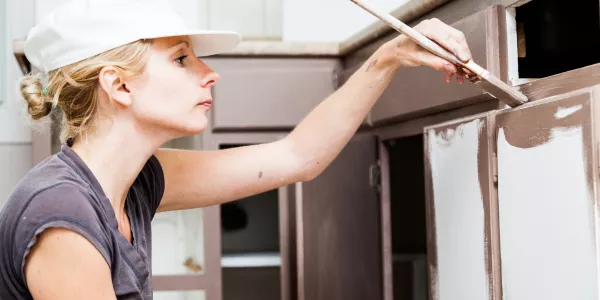
Painting the cabinets with your chosen paint
After the primer sets, start painting with your chosen color. Use a brush and foam roller to apply a thin, even layer, smoothing out any excess. It's fine if the primer shows through after the first coat. Wrap your tools in plastic and refrigerate them to keep them wet while waiting for the paint to dry.
Sand gently between coats for a smooth finish, and wipe off any dust. Apply a second coat for a consistent, saturated look. Generally, two coats of primer and paint should suffice.
Reattach the hardware
After applying the final paint coat, it's advisable to wait at least 24 hours, or longer if possible, before reattaching the cabinets. This waiting period allows the paint to dry thoroughly and harden to a durable, enamel-like finish.
Rushing this process could result in smudging the paint, potentially leading to additional sanding and repainting. Patience is key here for the best results. You might also consider adding new handles or hinges for a refreshed look.
People also ask
How Much Does It Cost to Paint Kitchen Cabinets?
Hiring professionals for the job can be expensive, with costs potentially reaching up to $2,500. In contrast, a DIY approach can drastically reduce expenses, potentially ranging from around $200 in a smaller kitchen to about $775 for larger projects.
This cost-effectiveness is even more pronounced considering the high expense of replacing cabinets entirely, which can range from $3,000 to $25,000. Additionally, incorporating new hardware or hinges can add to the overall cost. Thus, whether you choose professional services or decide to DIY, retaining and updating your existing cabinets is a financially savvy choice.
Can I Paint My Cabinets Without Sanding?
While sanding is recommended for the best adherence and finish, there are paints and primers available that can adhere to unsanded surfaces. However, the longevity and finish might not be as good as when the cabinets are properly sanded.
How long does it take?
The entire process can take several days, considering the drying time between coats and the preparation involved. For smaller kitchens, the project might be achievable over a weekend, depending on your pace. However, larger kitchens could need about six to eight days.


